Last updated on October 22nd, 2023
So you want to start a blog? This is my free and easy step-by-step guide to creating your very own blog from scratch.
When I created my very first blog, I made a lot of mistakes. At that time I did not follow any guide at all. Hence, I wasted a lot of time just getting the blog set up.
You do not have to make these mistakes. All you need to do is follow this easy and simple step-by-step guide and you will create your very own blog in minutes.
Learn all about What is a blog? and have a basic understanding of what blogging is.
Jumpstart your guide to create your first blog here >>> Step 1
Who Is Suitable To Start A Blog?
As long as you have a computer and an internet connection you can start a blog. You are not required to know HTML (Hypertext Markup Language) anymore to create a blog.
Nowadays, it is so easy to create a blog compared to 10 years ago. By the way, there is no age limit for starting a blog. Be it 10 years old or 70 years old, you are all welcome!
Why Start A Blog?
At first, people create a blog as their personal online journal, sharing their own interests and hobbies with the public.
Later, some bloggers started to share their income reports and how they could make money from their blogs.
Starting a blog become a dream to be able to own a business online to make money.
Find out How much money can you make from blogging and the possibilities to build an online business(on the side) from home
Normally you need thousands of dollars to start a business but now with a very low investment needed to kick start a blog, it soon becomes a popular means to build a business online on the side from home.
Read more about: How much does it cost to start a blog on WordPress >>
No more going to the office, no more 9 to 5 job. Imagine you are at the beach with your laptop building your business. This is the kind of lifestyle many are dreaming of.
Thus, many have learned about this opportunity and started their blogging journey and some have already achieved their dream.
Free or Self-Hosted Website?
Before I start my tutorial, it is best for me to address whether to build a free or self-hosted website (a blog is a type of website).
In my opinion, if you just want to have a feel of what blogging feels like and you only want to blog about your personal interests. Then a free website is all you need to get started.
To create a blog for free, you can select any of the following free platforms:
Do note that since you are using a free platform, you do not need to buy a domain name. Your blog address will be, for example, yourblogname.wix.com or yourblogname.weebly.com
Since you do not own your blog, do remember to follow their term of service. If not, they have the right to suspend and delete your account if they find you are violating it.
Why You Need To Own Your Blog
This brings me to an important point why you need to own your blog if you are planning to start a blog as a business.
You cannot afford to have your blog suspended or deleted after all the work you have done.
Moreover, there is a lot of restriction on how you can monetize your free blog. Customization of your free blog is also very limited.
Hence, for business go for self-hosted.
Do note that my step-by-step tutorial is for a self-hosted blog.
So, are you ready to create your very own blog and build your dream one post at a time?
If you are ready, let’s begin!
What will be covered in this step-by-step guide to creating your first blog:
1: Select the Blog name and domain
Step 1: Select Blog Name And Domain
The blog name is very personal. Is your blog. It’s your choice to decide what name you want for your blog. You have to like it!
Some bloggers used their own name as their blog’s name. This is all right but if you want to sell your blog in the future, having your name as a domain name might not be suitable. Think about it!
My advice is: not too long and make it easy to remember.
Which Domain Extension?
The domain extension is the last part of a domain name. Take my domain name, for example, exploringim.com
.com is my domain extension.
I personally prefer .com over the rest but is your choice. Other domain extensions available are .net, .info, .co, etc.
Domain Name Generator
If you really have no idea what name to pick. You can use the following domain name generator to have some idea to start with: namevine.
Another way is to choose a blog name according to your niche (if you already have something in mind). A Blog niche is topics you want to write about on your blog.
Read on: 7 profitable blog niche to get you more traffic and makes more money >>
For instance, if your blog niche is about Fashion, you might want to have a blog name, such as stylefever.com for example.
My advice is to have a few names on hand in case the domain name is not available.
Once you have decided on your domain name, it’s time for step 2.
Step 2: Web Hosting Company
In order to host your new blog, you do need to sign up for web hosting services.
What is Web Hosting?
Simply said, hosting is the home of your website(blog). If you own a website, you need a place to host it.
For web hosting, I recommend Bluehost.
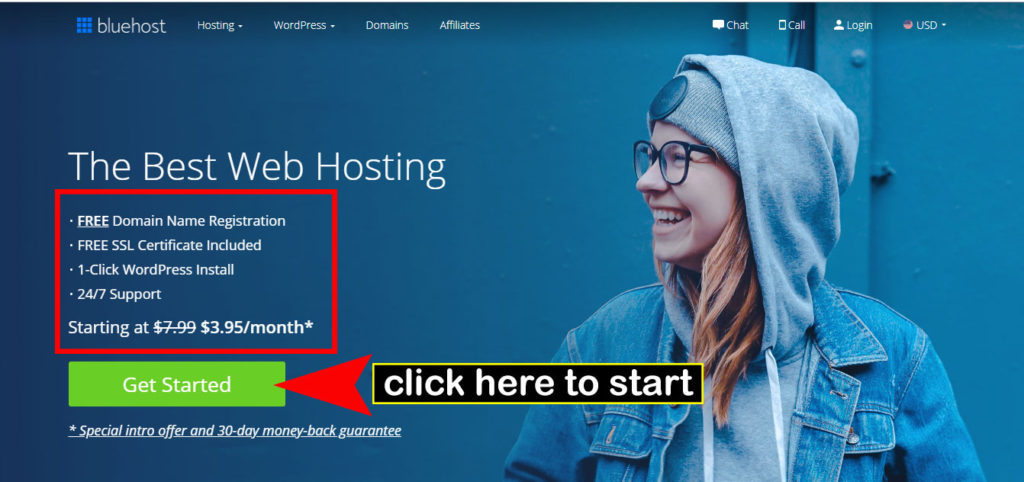
Bluehost is one of the top web hosting companies in 2019. They are the #1 recommended web hosting by WordPress.org and you can start a blog with them for as low as $3.95 a month for a basic 36-month price (normal price $7.99 per month) with my link.
For me, my reason for choosing Bluehost is very simple. First, it fits my budget. Second, it comes with a first-year free domain name(value $12) and a Free SSL certificate(Secure Sockets Layer). Most important of all, they have great support.
Now let’s start the step-by-step guide to creating your very first WordPress blog on Bluehost
1. Click “Get Started”
Click the picture below for the special $3.95 per month rate for the basic 36-month price (normal $7.99 per month) on Bluehost and click “Get Started”.
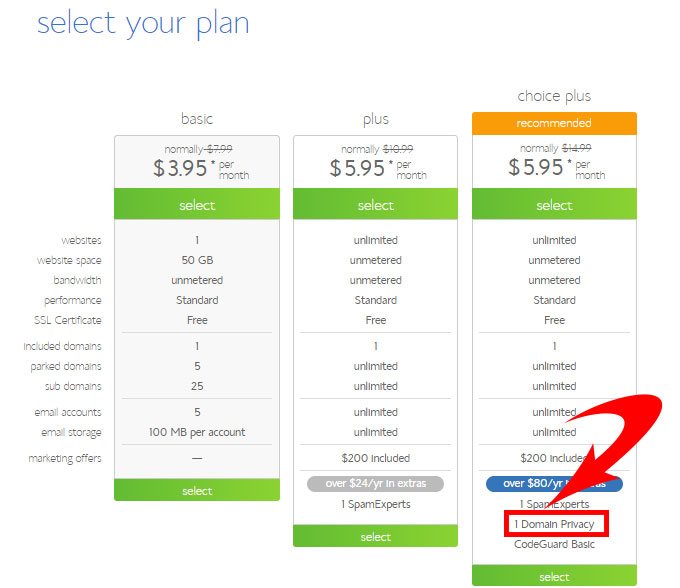
2. Select your plan
For a new blogger, I recommend you select the basic plan.
But there is something I like you to take note of. If you require Domain privacy for your new blog, you can consider “Choice Plus” as it comes with one free domain privacy.
If you cannot decide now, just go and select the “basic plan”. You can still log into your Bluehost control panel and click the “Upgrades” tab to enable Domain Privacy($0.99 per month) on any of your domains at a later date.
Do you need domain privacy?
ICANN, the organization tasked by the government with managing domain names, requires contact information for every domain owners to be publicly listed in a Whois database. This makes it easy for anyone to find and contact the owner of a domain name, including scam artists, hackers, and identity thieves. Whois lists information such as phone numbers, emails, and even home addresses.
source Bluehost
Fortunately, by simply enabling Domain Privacy, we mask your personal info with our own. You still own your domain name, but your personal information won’t be publicly displayed. For example, the address and phone number listed will be that of Bluehost instead of your own.
As I said earlier, is your blog and you have to decide whether to have domain privacy or not. There is no right or wrong.
Once you selected your plan, get your domain name ready. Let’s go to the next step.
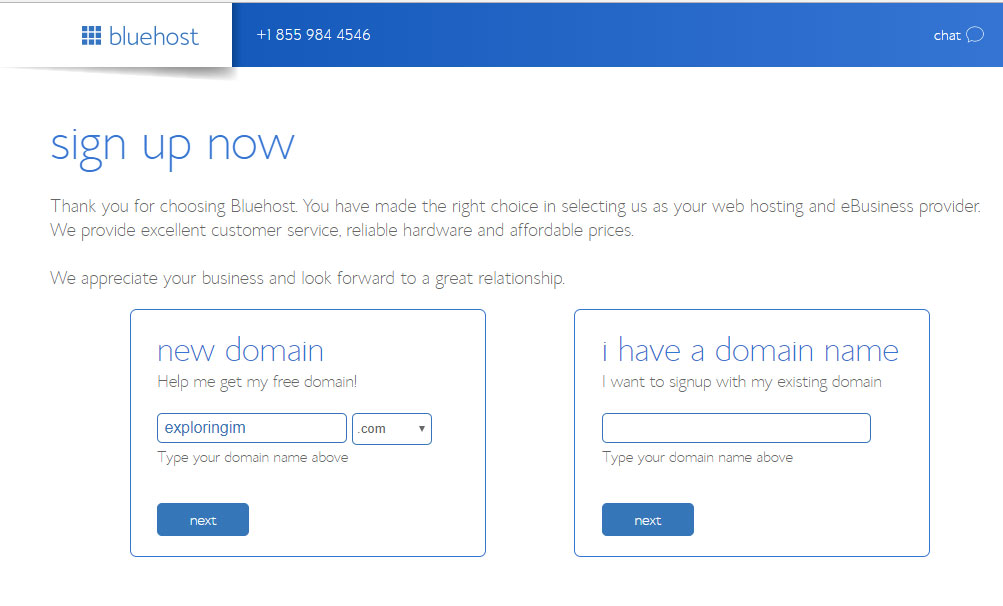
3. Claiming your free domain name
Now, remember the domain name I talk about in step 1. It’s time to claim your free domain name.
Now enter your
The box on the right “I have a domain name” is for people who already have a domain name registered somewhere else.
If you have a domain name already, enter it at the “I have a domain name” box and click “Next”.
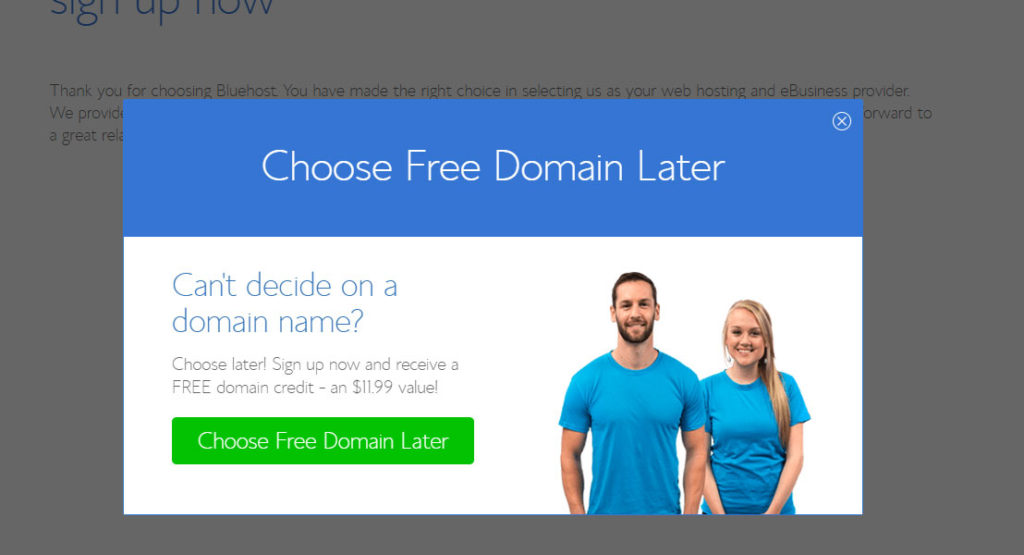
If unfortunately all the domain names you choose are not available, do not despair. You can have the choice to choose your domain name later.
See the picture below, just click “Choose Free Domain Later”.
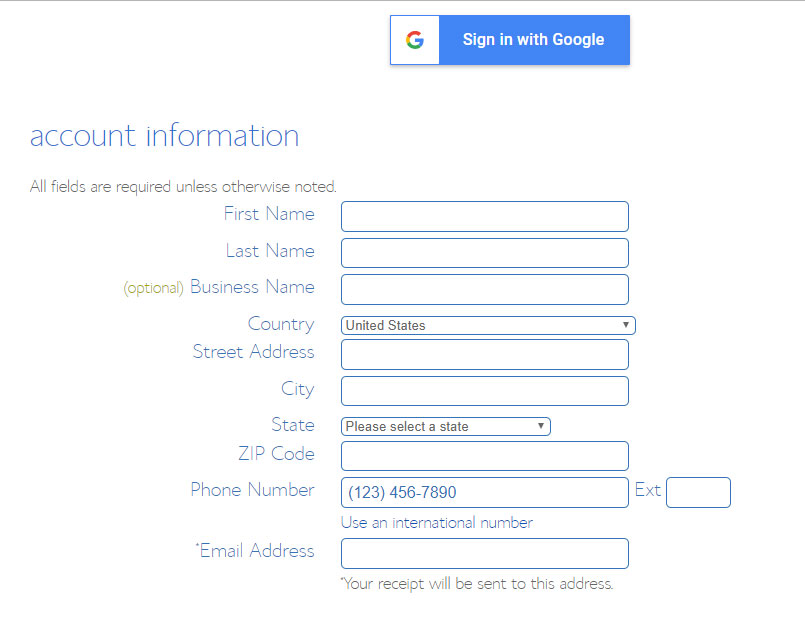
4. Create Your Account
Now is the time to create your Bluehost account.
You can either key in your information or just sign in with your Google account.
Next will be selecting your package plan.
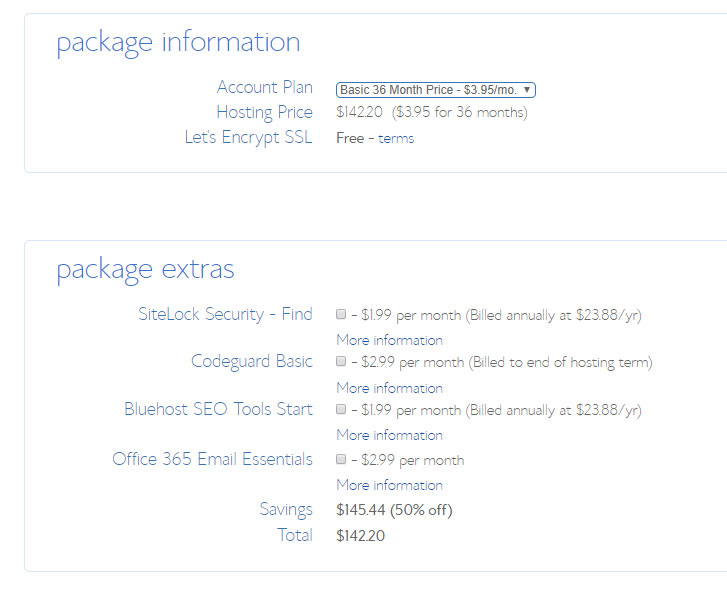
Choose the Basic 36-month price of $3.95 per month. For the ” package extras”, if you do not require them, you can uncheck them.
For me, I did not purchase any of the extras packages.
Now it’s time to fill in your payment details.
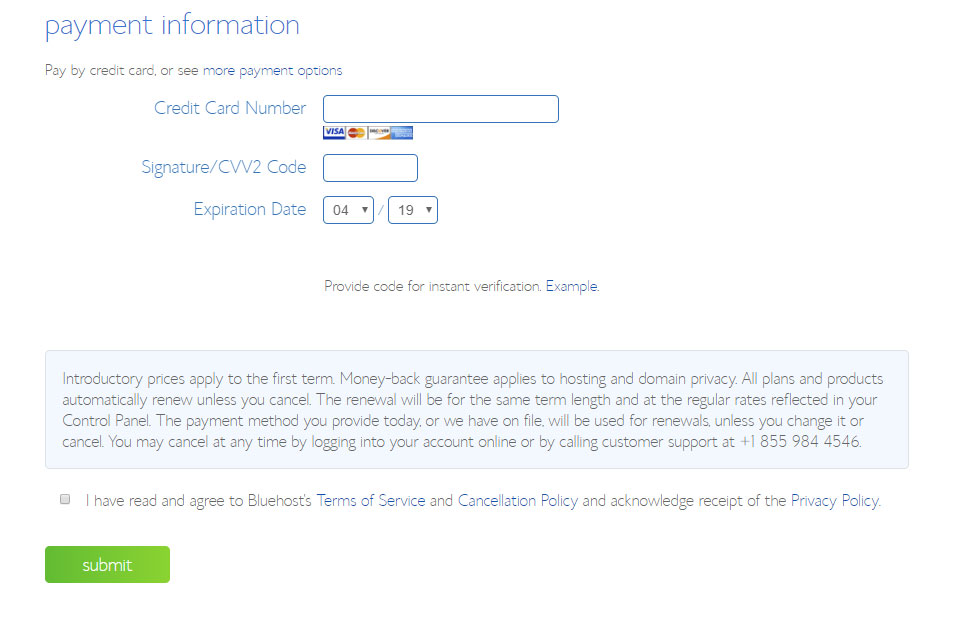
Once you have filled up the payment information, tick “I have read and agree to Bluehost’s Term of Service and Cancellation Policy and acknowledge receipt of the Privacy Policy” after you have gone through it.
Click “submit” once you are done and you will see a confirmation page. To activate your domain, you need to check for your confirmation email and click “verify your email”.
5. Create your Bluehost’s account password
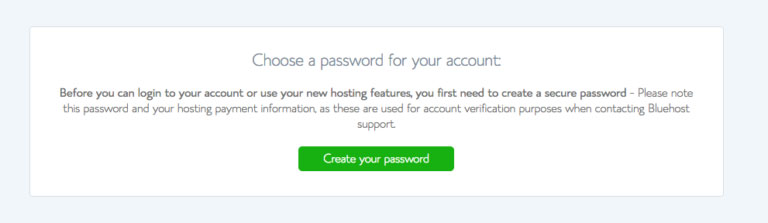
This password you are creating is for your Bluehost account.
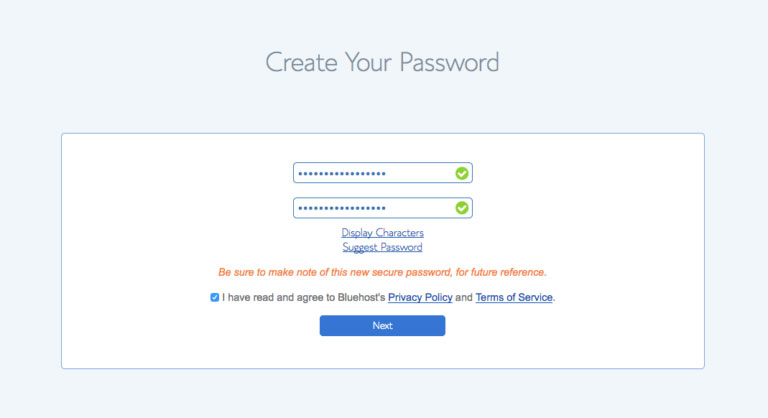
Create your password, read and agree to Bluehost’s Privacy Policy and Terms Of Service and then click “Next”.
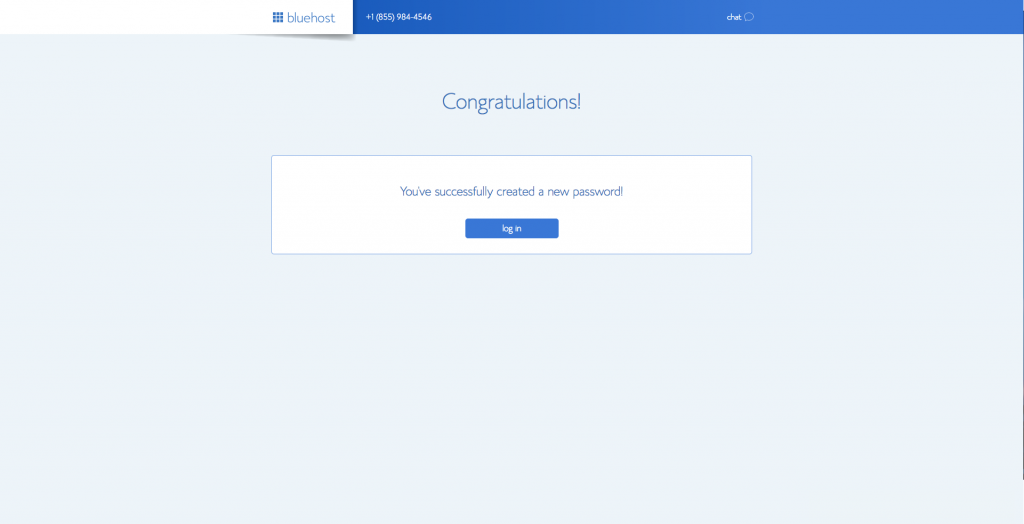
When you see this message ” Congratulation”, that means you have successfully created a new password for your Bluehost account.
Now you can click the “log-in” button to log into your account.
6. Pick a theme and install your WordPress
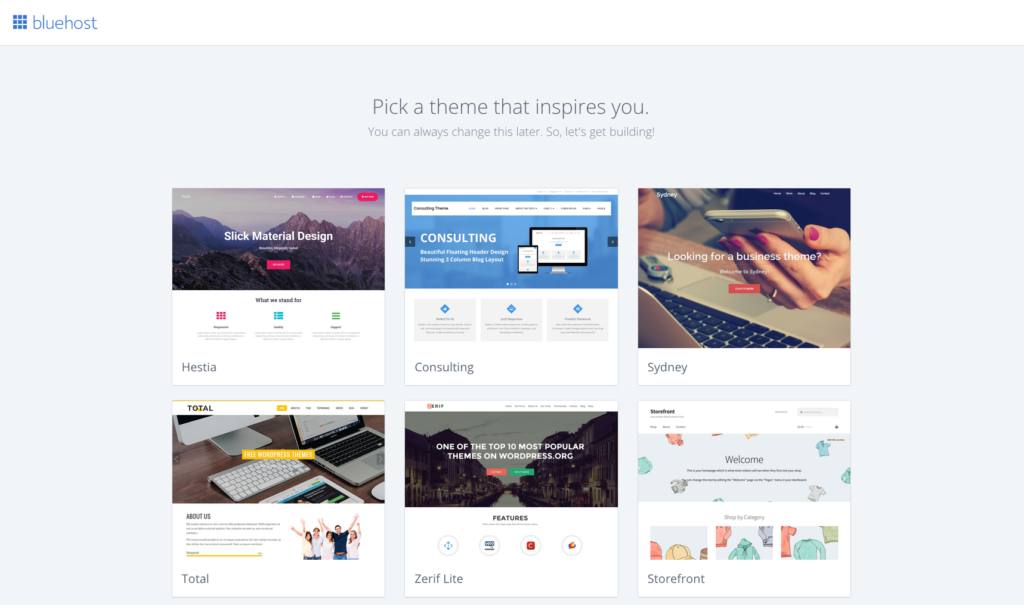
Pick a theme for your blog and do not worry as you can easily change it later if you find a better theme.
Hold tight Bluehost is setting up your site. Once your site is set up, click “Start Building” and you will be at your blog dashboard.

At this time, Bluehost will email you your blog log-in information to the email you provided earlier. (Note: Your login details for your blog are different from your Bluehost account)
7. WordPress Dashboard

When you see this, that means your blog is already set up. Now at your blog(WordPress) dashboard. You will be asked a series of questions. Just follow the questions, and do the basic set-up for your blog.
If you do not need help just click “I don’t need help”.
At this stage, you have already bought your domain name and you have successfully installed WordPress software.
The next step will be designing your blog.
Step 3. Customizing Your Blog
1. Logging In
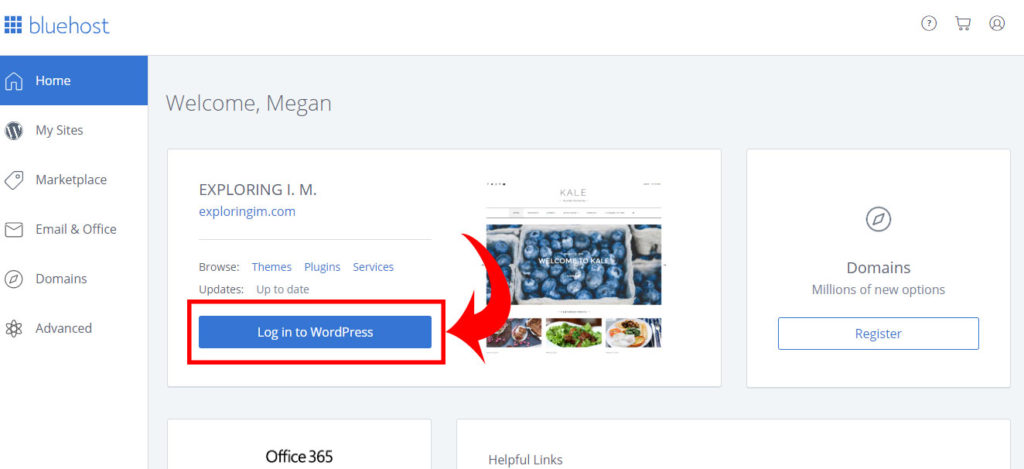
There are two ways to log into your blog account. One is via your Bluehost account, the other your WordPress account.
Log in to your Bluehost account, and you will see this image below. Just click the “Log in to WordPress” button.
Another way is via your WordPress account. Go to http://www.yourblog.com/wp-admin to bring up the login screen (replace “yourblog.com” with your domain name). Do check the email that was sent to you from Bluehost. There you will find your login details for your WordPress account.
2. Designing Your Blog
What is
To install or change your blog themes, go to your blog’s dashboard, then go to “Appearance” tab > Themes
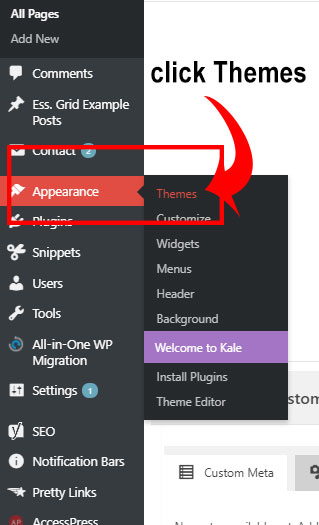
This is what my theme dashboard looks like. For yours, it will look different. There should be a few themes already installed on your blog: Twenty-Seventeen, Twenty-Sixteen, etc.
In order to use the theme, hover to the theme you like and click “Activate”.
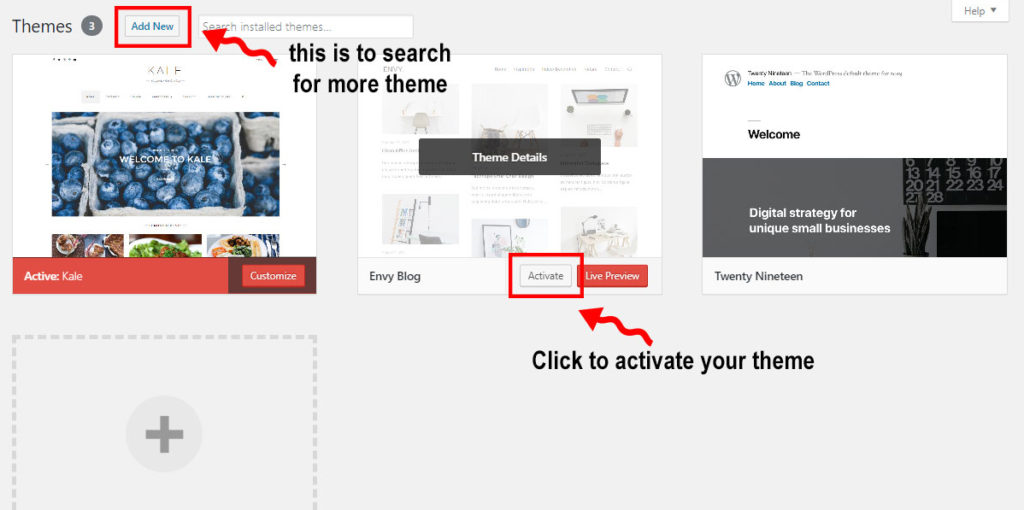
For more theme options, click ” Add new ” on the top left of the page(see above).
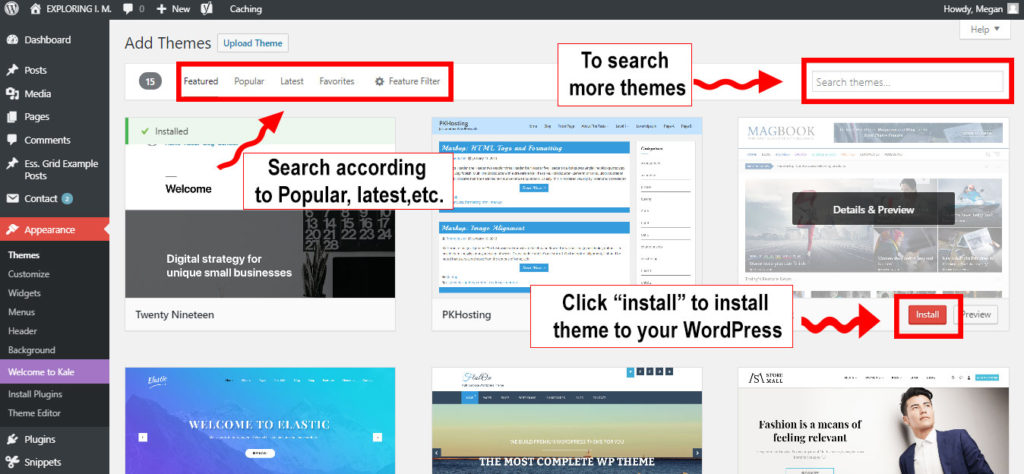
Here at “Add Theme”, you can search for more themes according to popular, latest, etc. You can even key in your requirements in the “search theme” box.
From the search result, you can test out each theme to see what it looks like by clicking on “Live Preview”.
Once you find the theme you like, you just need to click “install”. Once installed, go back to “Themes” and click “Activate”.
If you have no idea about which theme to choose, I would like to recommend the theme I am using right now: Generatepress Theme. It is a lightweight WordPress theme built with a focus on speed and usability.
It’s a free theme. Simple to customize and easy to use.
3. Create Pages, Post, Menu and Widgets
Creating A Page Or Post:
- Access your WordPress admin panel by logging in.
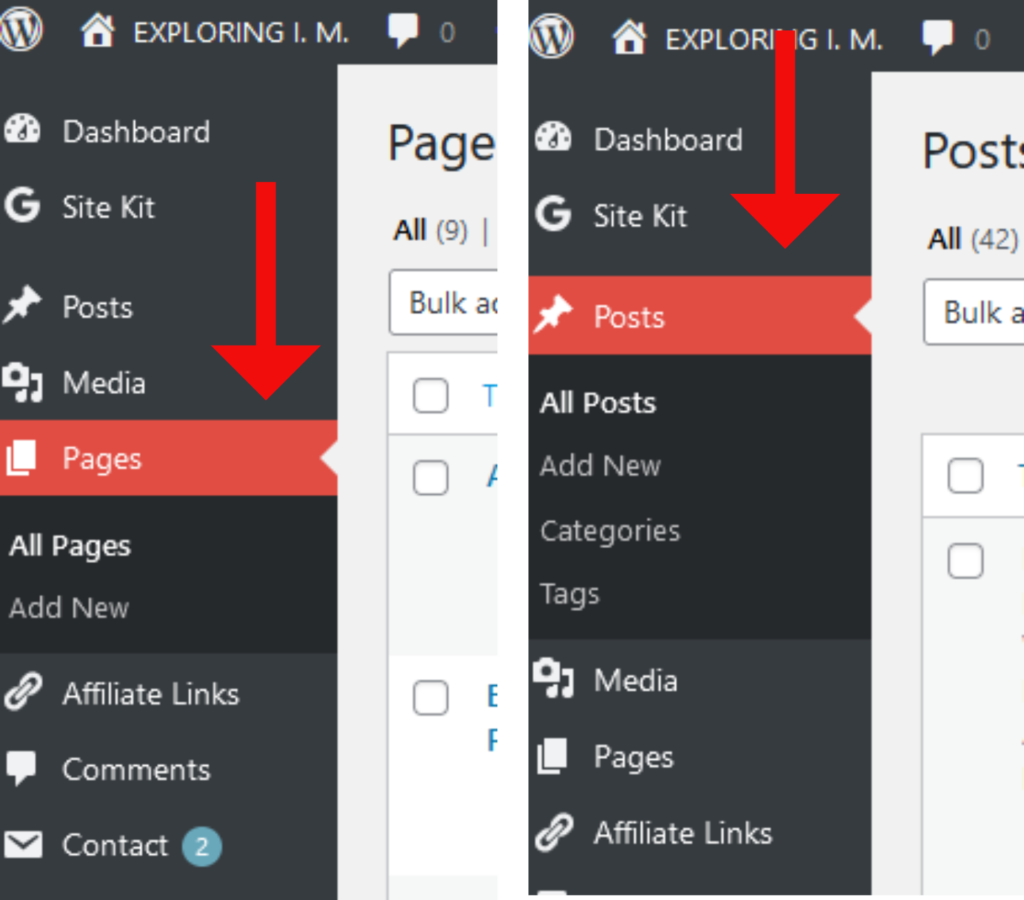
- Click “Pages” to create a new page or “Posts” to make a new blog post from the menu on the left
- Click “Add New” to begin adding content to your page. After titling your page or post, add the content using the editor.
Create Menu & Widgets
Adding a Widget:
- Widgets are a great way to improve your website once you’ve made your page or post. Small, useful components called widgets can be put on the sidebars of your website or other widget-ready spaces.
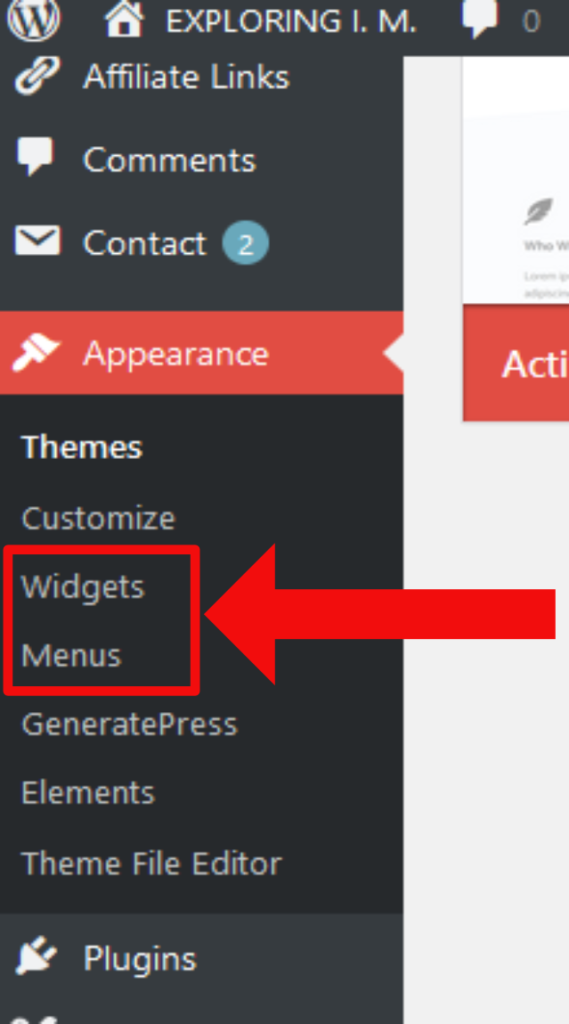
- To include a widget, navigate to the dashboard’s “Appearance” section and choose “Widgets.” This is where you may add features like recent articles, categories, or custom HTML content by dragging and dropping widgets to your sidebar or other widget places.
Creating a Menu:
- To add your newly created page or post to your website’s menu, go to “Appearance” and choose “Menus.”
- Edit an existing menu or create a new one.
- A list of your pages and posts will appear on the left. After making your selections, click “Add to Menu.” to add those items to the menu.
- The menu items can then be dragged and dropped into the desired order.
- The menu will appear on your website once you save it.
4. Create Your Very First Post
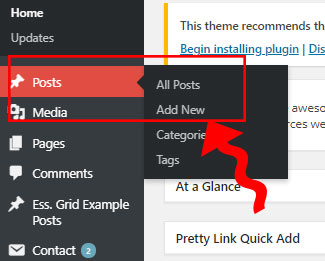
To write your first post, go to your blog’s dashboard, then go to “Posts”> Add New
I like to share with you this video. It is very useful for you to have a basic understanding of how to create a post in WordPress 5.0 Gutenberg editor.
Once you have finished your post, just click the “Publish” button on the right side of the screen to publish it.
Here is my post: 101 blog topic ideas for your blog where I shared some topic ideas that you can use on your new blog.
Interested to gain some basic knowledge on how to do your own keyword research for your future blog topics, you can refer to my post: What to blog about? Beginner’s guide to writing what people want to read.
Step 4. Publish Your Blog
After you publish your first post, your blog may not be visible to the public. It may still be showing the “Coming soon” page.
When your blog is ready to go public, click the “BlueHost” menu at the top left corner in your administrator area then click the blue “Launch” button to remove the “Coming Soon” page(see image below).

Step 5. Promoting Your Blog
For a new blog, I would advise you to write more posts (at least 5) before you start promoting your blog. If these posts can be interrelated, that will be even better.
For a new blog, Pinterest is a very good social media platform to start with. It is free to set up an account on Pinterest.
Do make sure you optimize your blog posts for SEO from the very first post. Implementing correctly this will help you get free traffic from Google.
Here are some posts to help you understand SEO better:
- What is SEO?
- 6 Ways To Optimize Your Blog Posts For SEO
- 10 tips for an awesome and SEO-friendly blog post
Step 6. Make Money With Your Blog
There are a few ways to earn money from blogging. One popular way that most bloggers use is “Affiliate Marketing”. I have discussed in-depth in this post what is affiliate marketing and show you some examples of how bloggers insert their affiliate links in their blogs.
In my post “How to make money with a blog for beginners“, I write about the 4 popular ways pro bloggers use to make money with their blogs.
You as a blogger get to decide which method you want to use. Use all or just a few methods.
Step 7. Other Blog Resources
Here are some blog resources that will be useful to you:
- 22 awesome places to find free feminine-styled stock photos
- 10 amazing sites with free stock photographs
- 17 beautiful free and premier script fonts
In conclusion,
I hope this step-by-step guide has provided you with all the information needed to create your very first blog.